Extending the Database
The following instructions describe how to make changes to the USGS Workbench database structure. This is needed if you want to add new tables or views to support new Workbench features.
First, remember that the Workbench uses a local SQLite database stored on each user’s computer.
Before You Begin
Clone the git repository that contains the Workbench code. The folder at SandbarWorkbench\Database contains the files related to the SQLite database structure.
Overview
The database structure is defined by a file in this folder called latest.sql. It contains all the SQL statements to create tables, indices, views etc. Do not edit this file directly! This file is used to create new copies of the Workbench database from scratch, within the Workbench software.
The database structure SQL file is generated by running a series of SQLite command line operations stored in the file called workbench_export_commands.txt. These operations use the dot SQLite commands (so called because each command begins with a period “.”). There are lots of SQLite dot commands, but the ones of relevance here are:
.outputspecifies an output file path where subsequent commands will send their results. This command should only be used once at the top of the file to generate the one and only SQL output file that will contain all the SQL operations for the entire database..dumpoutputs both the structure and contents for a particular table. i.e. it first outputs aCREATE TABLEstatement followed by individualINSERTstatements to add all the data. This command should be used for Lookup tables with static content that is shared by all users..schemaoutputs just the structure for a particular table. i.e. just theCREATE TABLEstatement..printoutputs literal text. This is useful if you need custom SQL statements to appear in the output file.
These commands can be called with a single database object name (no quotes required) or a pattern that matches several items (quotes required):
.dump AnalysisBins      <-- Matches single table
.dump 'Version%'        <-- Matches all tables that start with the word Version
All the SQLite commands are performed as one step by running the DOS batch file workbench_export.bat. This simply calls the SQLite software executable and passes the path of the command text file. Before running this batch file you should open it and verify the paths to both your SQLite executable and your existing Workbench database are valid. The syntax of this file is:
<path>\sqlite3.exe <path>\workbench.sqlite < workbench_export_commands.txt
Making Changes to the Workbench Database Structure
Follow these steps to make changes to the Workbench software.
1. Create a Copy of the Latest Database
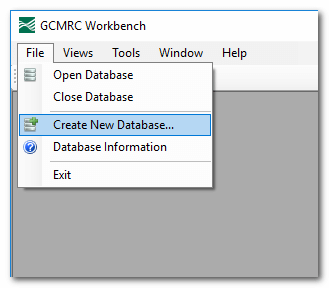
Start by creating a copy of the latest Workbench database. You can do this one of two ways. 1) Use the Workbench software and choose “Create New Database” from the file menu (see screenshot above), or 2) Run the latest version of the latest.sql file stored in git, using the SQLite executable. WARNING: Do not simply use an existing database with real data in it. Always make database structural changes to a copy of the database or you won’t be able to revert back to your real data later.
2. Make Database Structure Changes
Make your desired changes to this new copy of the database. SQLite Studio is an excellent user interface for making changes to SQLite databases. Typically you will do this in conjunction with some software functionality, either in the Workbench user interface code or as standalone Python scripts etc. It’s advisable that you finish both the software features and database changes and do some testing before you proceed with the next steps. What follows is time consuming and involves deploying your changes to other users. It’s best if you deploy your changes to other users as little as possible so as to reduce the number of different database versions in circulation.
3. Increment the Database Version Number
Open the modified database and review the contents of the VersionInfo table. Increment the DatabaseVersion field by one integer and change the CreatedOn record to todays’ date. Open the VersionChangeLog table and add as many records as needed to describe the your changes.
4. Generate “New Database” Script Describing Changes
Run the workbench_export.bat batch file against the modified database structure. Manually review the new latest.sql file. This is easiest using a file difference utility such as GitGraken, SourceTree or DiffMerge. Make sure that the your changes are accurately reflected as SQL statements. Remember, this script will be used by Workbench users to generate new copies of the Workbench database.
5. Generate “Update” Script
You now need to generate another SQL script file that describes the changes from the previous version to your latest version. Fortunately, SQLite comes with the sqldiff.exe utility that will generate all the necessary SQL statements. Run the command:
<path>\sqldiff.exe <path>old_workbench.db <path>\new_workbench.db > update_XXX.sql
Be absolutely sure that you use a copy of the previous verison of workbench database for the old database and the one containing your changes for the new database. Also confirm the file naming convention for update files. These must all match a simple Windows file searching wildcard pattern such as update_?.sql
Important Notes:
- Your update script must leave the database in the precise format that you want. This includes an UPDATE SQL command to set the
VersionNumberfield in theVersionInfotable to your new version number. - Do not use the
--transactionflag on thesqldiff.exeoperation. The Workbench C# code will wrap all upgrade steps in a single transaction so that it can rollback the users database should anything go wrong.
6. Update the Workbench Software
Open the Workbench software in Visual Studio and perform the following steps:
- Open the Solution Explorer.
- Turn on display of “All Files”
- Expand the
Databasefolder that contains the SQL scripts you just created. - Right click on the new
update_XXX.sqland choose “include in project”. - Right click on the new
update_XXX.sqlagain and choose “Properties”. - Ensure that the type is set to
Content. - Change the “Copy to Output Directory” to
Copy if newer - Rebuild the project.
- Navigate to the build folder and visually confirm that the new update script file is present in the Database subfolder.
- Finally, open the project “Settings” and set the
DBVersionRequiredto the new version number.
6. Testing
Launch the Workbench software and attempt to open a copy of the previous version of the database. You should be prompted to upgrade this database to the latest version. Proceed and test this upgrade process until it works smoothly. Visually check the resultant database using SQLite Studio and verify the table and data changes.
7. Deploy
Commit and push all your changes to git using meaningful commit messages. Contact North Arrow Research to deploy a new version of the Workbench software. Once this is done all workbench users will be prompted to upgrade their databases the next time they attempt to open an older version.